Tuesday, December 11, 2012

12 Days of Christmas - Financial Preparedness Version


This post is from back in 2009.  Although it may be a little late as the shopping season has already begun, perhaps you can still find some value in one of the ideas presented.  Enjoy.

1st Day - Pay your tithing.
2nd Day - Pay a generous fast offering.
3rd Day - Budget. Make a Christmas budget for each person you are buying gifts for (including extended family). Assign a reasonable amount to each person and then track what you spend on your budget. Make sure to write down what you buy as soon as you buy it so you don’t overspend. Follow your budget carefully.
When this Christmas is over total up what you have spent this year. Divide your total by 12. Put that amount (your total/12) in a savings account every month next year and let it sit until Christmas. Next year when Christmas comes around you will already have your budget funded and ready to go. It will take away stress and make your Holidays more enjoyable.

4th Day - Keep it Simple. Remember that children are easily pleased. Don’t overdo it. One fun toy can make their entire Christmas memorable.
5th Day - Be Practical. Kids get excited opening presents, even when it is a package of new underwear underneath the wrapping paper (see pictures at end of blog). Buy your kids things they need for Christmas. Things you will need to buy them anyway. Socks, underwear, boots, hats, coats, pants, shirts, undershirts, etc.
6th Day - Stay Home. Rather than going out and spending money for Christmas family activities, try starting new traditions right at home. Have a family game or movie night, make crafts together, bake Christmas treats, tell Christmas stories, sing Christmas songs, play in the snow, make up a game to play together. Make more memories with your family for free. The memories will last forever.
7th Day - Watch for sales. If you stay on top of sales, you rarely have to pay full price for anything. Buy things you know you will need when they are on sale.
8th Day - Clip Coupons. There are many coupons available to print from home for food and holiday goodies. Follow our link to Savvy Shopper Deals. Set your location as Utah. Go to shopping wizard>grocery deals. Search your favorite stores for great deals. If a printable coupon is available for an item, it will be listed as a link under the item information. $1/one Desitin coupon link, for example.
9th Day - Cut back on neighbor gifts. It is a nice tradition we have to share gifts and warm wishes with friends and neighbors during the Holidays. However, sometimes sharing a thoughtful card or short note can be just as meaningful if not more that giving a gift. Have a fun family night and make cards for your neighbors out of items you already have at home. Deliver the cards as a family and spread the Christmas spirit.
10th Day - Don’t feel obligated. Remember this is a season of giving, not of stress or guilt. If someone gives you a gift, you don’t have to feel obligated to return a gift. Receive it with gladness.
11th Day - Can you afford it? Don’t pay interest on credit cards. If you don’t have it, don’t spend it. Remember Elder Hales’ April 2009 Conference talk: “The first lesson was learned when we were newly married and had very little money. I was in the air force, and we had missed Christmas together. I was on assignment overseas. When I got home, I saw a beautiful dress in a store window and suggested to my wife that if she liked it, we would buy it. Mary went into the dressing room of the store. After a moment the salesclerk came out, brushed by me, and returned the dress to its place in the store window. As we left the store, I asked, “What happened?” She replied, “It was a beautiful dress, but we can’t afford it!” Those words went straight to my heart. I have learned that the three most loving words are “I love you,” and the four most caring words for those we love are “We can’t afford it.”
12th Day - Do you need it? Again from Elder Hales’ talk: “The second lesson was learned several years later when we were more financially secure. Our wedding anniversary was approaching, and I wanted to buy Mary a fancy coat to show my love and appreciation for our many happy years together. When I asked what she thought of the coat I had in mind, she replied with words that again penetrated my heart and mind. “Where would I wear it?” she asked. (At the time she was a ward Relief Society president helping to minister to needy families.)
Then she taught me an unforgettable lesson. She looked me in the eyes and sweetly asked, “Are you buying this for me or for you?” In other words, she was asking, “Is the purpose of this gift to show your love for me or to show me that you are a good provider or to prove something to the world?” I pondered her question and realized I was thinking less about her and our family and more about me.
After that we had a serious, life-changing discussion about provident living, and both of us agreed that our money would be better spent in paying down our home mortgage and adding to our children’s education fund.

We hope at least one of these tips will save you from spending money on 12 drummers drumming to a partridge in a pear tree this Christmas! Happy Holidays, love Kevin & Kammi.


Wednesday, November 14, 2012

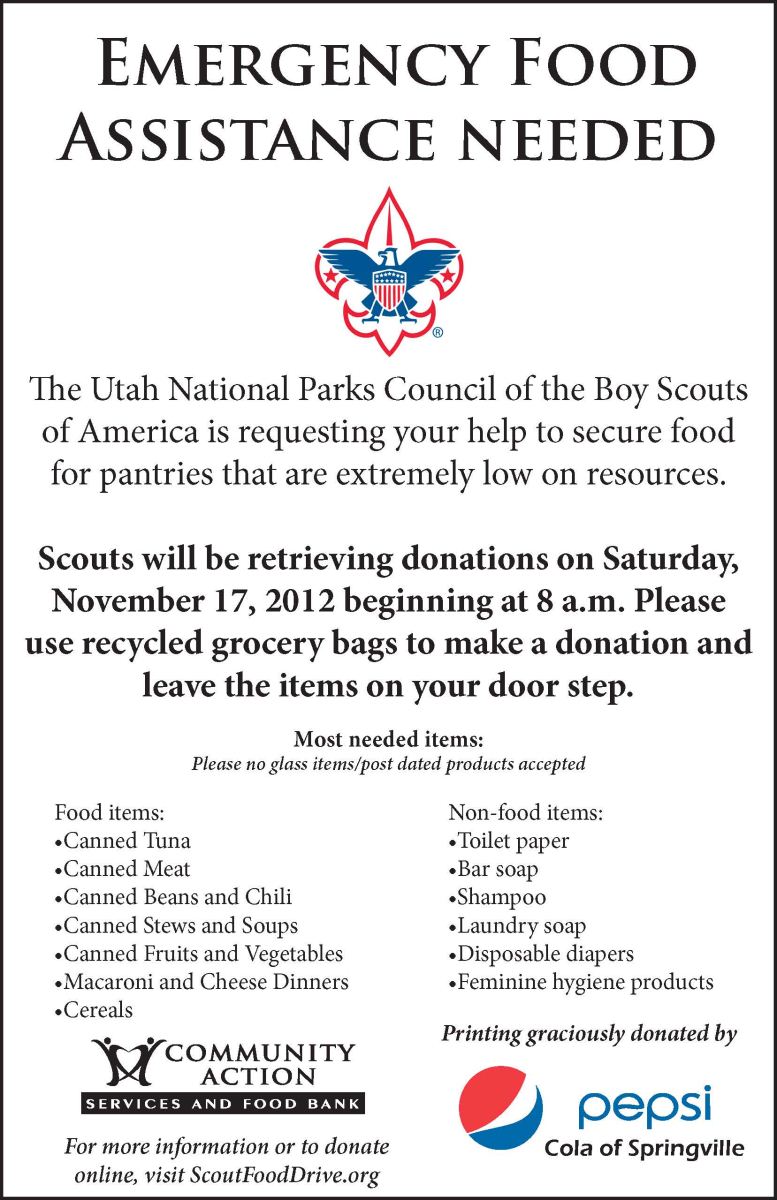
Emergency Food Drive Saturday

Remember all the great deals we got at Smiths last week?  Now is the time to share the wealth!  Please join in the food drive on Saturday.  Details below.  Thanks.

Thursday, November 8, 2012

Add some coupons!

Visit coupons.com...
http://www.coupons.com/couponweb/Offers.aspx?pid=14505&zid=py13&nid=10&bid=110809113862db9fc8817214
for even better deals with the Smith's ad like:

Stove Top for $0.29  and
Jet Puffed Marshmellows for $0.45

Just to name a few.  There are also the great coupons for savings on any brand of milk and cheese.  Be sure to scroll to the very bottom of the list after the first time you print to print the same coupons twice.

Happy shopping!

Tuesday, November 6, 2012

Smith's Sale Extended

The wonderful sales at Smiths will now run through November 13th!  See the post below for sale prices.  Happy shelf stocking.

Monday, November 5, 2012

Stock up on Food for the Winter

A few years ago I came across a killer deal on canned corn.  It was about $0.30/can for Green Giant corn.  I thought that was a great deal for any brand so  I bought one case.  Then something happened.  I got hooked on Green Giant corn.  It is so sweet and yummy that I found I couldn't buy any other brand and enjoy it.

So, if you want to try what I think is the yummiest canned corn now is your chance.  The Green Giant veggies are regularly $1.49/can at Smith's but they are on sale until Tuesday (tomorrow!) for $0.49/can!  Please note the prices below are all the final price when you buy in groups of ten.  I was there today and there was still plenty of vegetables and cream soups.  Here are the great deals:

Green Giant Corn $0.49/can
Green Giant Cream Corn $0.49/can
Green Giant Cut Beans $0.49/can
Green Giant Sliced Green Beans $0.49/can
Campbells Cream of Chicken Soup $0.69/can
Campbells Cream of Mushroom soup for $0.69/can
Swanson Chicken Broth $0.49/can
Stove Top Stuffing $0.79/box
Del Monte Fruit $0.99
Ocean Spray Cranberry Sauce $0.99
Marie Callendars Frozen Pies $4.49

Awesome prices for brand names!

Remember you must buy any combination of 10 of these items to get the good deals.  You can also price match at Walmart and then you usually don't need to buy in tens. 

Happy shelf stocking!

Wednesday, October 31, 2012

Lindon Cannery Needs Missionaries - Part Time

Please see letter below:

Dear Subscribers,
We are way behind in finding missionaries for 2013. If you are possibly interested in serving at the Cannery next year, please send an email to wel-ca-lindon-wetpack@ldschurch.org . Please include your stake name.
We are needing around 10 new missionaries. Lindon Cannery missionaries serve for 1 year (Jan-Dec) for 2 assigned, 4.5 hour shifts a week (between 8-10 hours/week). We will only be working on Tuesdays, Wednesdays and Thursdays in 2013 and do not schedule production for the month of July. When needing to be gone on an assigned day, there are several other missionaries who do the same job you do so you can get substitutes and will be asked to substitute if needed.
This is an immediate request. First day of training is December 10, 2012. (No other responsibilities in December.) First day of production is January 8, 2013. We are down to the wire!!!
Looking forward to hearing from you! Remember to send to the email above. Do not reply to this email.
Teresa Hendrickson

Thursday, October 25, 2012

Winterized Vehicles

I know I am not the only one that absolutely loved the snow this morning.  I was lucky enough to drive the kids to school during the 20 minutes that it was acutally snowing.  I must say I very much enjoyed (no, I am not being sarcastic) driving slow in the winter weather.  Ahh, I love winter snow.

But, this brings us to an important point in the year.  Time to winterize your car!

Last time we learned how to make a portable heater for your car.  Now I have a list of other essential items and suggestions to keep you traveling safe during the winter months ahead.

First of all see that you have what you need to make simple repairs or change a tire on the go.  You should already have these in your vehicle.  Items you want may include:
  • jumper cables
  • wrench
  • pliers
  • screwdriver
  • spare tire - make sure it has enough air in it
Next, add some items for emergencies - the most likely being that you could get stranded in the cold.  Helpful items might include:

  • portable car heater
  • blankets
  • gloves
  • snow scraper
  • flashlight
  • batteries
  • matches
  • flares or reflective triangle
  • first-aid supplies
  • whistle
  • old carpet strip or kitty litter for traction
  • energy bars or other snacks
  • card games or other entertainment

And a few tips during winter travel season:

  • Make sure your cell phone is fully charged when going out -or- have some change in the car for phone calls (if you are lucky enough to be near civilization).
  • Keep the gas tank in your vehicle at least 1/2 full all the time.  Then, if you are stranded you should have some time to keep the car warm by running the engine.  This will also help prevent gas lines from freezing.
  • Keep a safe distance from the car in front of you.
  • Brake sooner and slower than usual and turn slower when in slippery conditions.

Finally, how to effectively winterize your car to avoid being stranded on the side of the road.

  • Remove leaves, twigs and other debris
  • Check your tires' condition - put on snow tires if you have them
  • Check tire pressure
  • Check to see that all lights are working
  • Check your heater and defrost system
  • Have your brakes checked
  • Check your windshield wiper blades and fluid
  • Make sure battery is fully charged
  • Check the anti-freeze, which may not need changing (see owner's manual)
  • Get your emergency car kit and put it in the car


  • Check out this link to an interesting article from Get Gephardt about winterizing and driving in the snow:

    http://www.ksl.com/index.php?sid=22681029&nid=1105&title=gephardt-gets-it-winterizing-your-car-could-save-lives&s_cid=queue-16

    Hope you found these tips helpful.  Now is the time to be prepared - before the disaster strikes.


    Thursday, September 27, 2012

    Cozy Car in the Winter

    I am already loving the cold crisp Fall air.  I am hoping this means a bundle of snow isn't too far away.  I can picture it now:

    Sitting in my comfy chair in my bunny slippers, sipping hot cocoa and watching the gigantic snowflakes fall to the ground.  Getting snowed in would be so much fun!

    Wait!  Unless you happen to be in your car somewhere not quite home yet.  Are you prepared for a situation like this?

    To help us get prepared, I will post some simple instructions from ehow.com on how to make an inexpensive car heater should you be stranded for a long period of time. 

    Now you can have a cozy car while you wait out the storm.  Storing bunny slippers and hot cocoa is optional.

    Next week we'll get into other essential items that would be of value in this situation.

    Definition

    • A homemade car heater is a small device placed in your car that heats it up when your car has broken down. They can be used to avoid the excessive carbon monoxide produced by your car if you leave it on to use the heater, which may end up killing you.

    Materials

    • You will need a roll of unscented toilet paper, six bottles unscented isopropyl alcohol, an empty metal can just taller than the toilet paper roll, matches, a 3 lb. coffee can and an aluminum pot wider than the coffee can. Store these in a large, sealed container in the trunk of your car.

    Building Method

    • Start by adding your toilet paper roll into the smaller empty metal can. Remove the cardboard core and any sheets necessary to fit the roll snugly in the can. Place this can into the coffee can and place this on the passenger seat floor. Pour several ounces but not a whole bottle of the alcohol onto the toilet paper and crack a window for ventilation. Light a match and throw it on the toilet paper. Conserve fuel by covering the can with the aluminum pot when your car is comfortably warm. Continue using your heater in this method until help arrives.


    Read more: Homemade Car Heater | eHow.com http://www.ehow.com/facts_7980686_homemade-car-heater.html#ixzz27iAZp6w0

    Friday, September 14, 2012

    Even Easier Water Storage - the Caselot Sale!

    Check out Smith's caselot sale.  It runs through next Tuesday, the 18th. 
    http://www.smithsfoodanddrug.com/Pages/default.aspx
    Follow that link and click on the 'weekly ad' button in the top right corner of the page.  The caselot is on page 7.

    During the caselot you can get a 24 pk of bottled water for $2.50!  Now there's an easy way to stock up on water storage!

    I noticed there are a lot of caselot items in the store that I didn't see in the ad.   I saw brown and powdered sugar, brownie mixes, vegetables, fruit, mac n cheese, etc.  Drop by Smiths and check it out.

    Also, on a great sale is Kraft Mayo and Miracle Whip.  When you buy 10 particpating items, they are only $2.50 each.  In addition, if you buy 10 quailifying Kraft items, you will get a $10 off your next shopping order coupon printed at checkout.  That makes each container or Mayo/Miracle Whip only $1.50.  Not too bad.

    One more thing to remember, last year I was able to price match the caselot price on single items at Walmart.  I assume they would do this again if you take your ad in.  It doesn't hurt to try.

    Have fun stocking your food and water storage!

    Saturday, September 8, 2012

    Quick Water Storage

    So far this year we have talked about food storage, 72 hour kits, and evacuation plans.  Next up is water storage.

    For a quick and easy way to store water and build up a supply gradually, simple rinse out (you may use 1tsp bleach to sanitize if you wish) and re-fill any plastic container with the letters "PETE" on the bottom of the bottle with water.  Label the lid with a date and place it in your storage room.  Old water bottles, Gatorade bottles, and 2 liter soda bottles work well for this purpose.  Milk jugs and juice bottles are not recommended.

    If your water has been commercially treated from a water utility with chlorine (not from a well), you don't need to add bleach to the water to keep it clean.  Just go ahead and store it.

    It is recommended you rotate your self-filled water storage every 6 months.  However, water stored longer is safe in emergency situations, it just won't taste as good.

    For more extensive information on water storage, visit: http://www.caltriplecrown.com/HarborHillsWard/WaterPurificationandStorage.pdf

    Monday, September 3, 2012

    Lindon Cannery Meat Canning

    Read through the information from the cannery below if you are interested in canning chicken or pork at the Lindon Cannery in October.  There is one link for each day available to can.  You will need to purchase 5 cases of meat after canning so you may want to go in on cases together with some friends.

    "We are sending out the links to the next family canning opportunity (Chicken Chunks & Pork Chunks) a little earlier than normal. The links aren't due to become active for scheduling until Saturday, September 8th @ 6:00 a.m., but you can click on the links and carefully read all of the instructions before that time. You will be accountable for everything said in the online instructions. "
    You can see the day and date at the end of each link.

    Thursday, August 2, 2012

    Yum yum Strawberry Jam!

    It's jam making time! 

    You can find strawberries on sale this week at Smith's for $1.25/pkg or at Macey's for $4.99/case (4 pkgs).  Haven't been to Walmart yet but I expect to see deals there too.  When strawberries are $1.25 or less, it's jam making time!

    Please see my post from April of 2011 for complete instructions on how to make homemade yum-o strawberry jam (on the right hand side of this page click on '2011' then 'April').  It will take only 1 hour to make 4 - 16 oz cans of jam (plan 1 1/2 hours for your first time).

    Please give me a call if you have ANY questions on how to make jam, cuz I love it!  We have gone 2 years without purchasing strawberry jam at the store, and you can too. :)

    Wednesday, July 18, 2012

    Stock up on Bottled Water

    It's always nice to have extra water as part of your food storage and in your 72 hour kits.  If you need to stock up, stop by Smith's this week for this deal:

    Kroger Bottled Water - package of 24, 16 oz bottles @ 5 for $10 ($2 each!)

    Not a bad deal, so do something for your family's emergency preparedness and grab one next time you are out.

    Tuesday, July 17, 2012

    Shelf Reliance Party

    Please join me this Thursday at 7:00 at my home for a Shelf Reliance party.

    I have invited Shelf Reliance over so that I can learn more about freeze dried and dehydrated foods.  The consultant has agreed to acutally do a cooking demonstration and make a dinner entree at the party.  I am so excited to see how this works so I can incorporate this kind of food storage into my everyday and long term storage. 

    I am hosting this party so I can learn about Shelf Reliance's product and how to use it (really not worried about the sales part of it!).  So please don't hesitate in dropping by just to learn about this type of food storage.  And, bring a friend!

    Saturday, July 7, 2012

    5 small steps for your 72 hour kit

    Time to pull out your 72 hour kits and make sure everything is still in working order and/or edible!  This could be a great FHE activity and can be accomplised in 5 easy steps:
    • Step 1: Have each family member bring their own kit to the activity.
    • Step 2: Use a 72 hour kit checklist to inventory each kit (Click on the '72 hour kit 3 month plan' for a list or use your own).   Have each family member report status of items in their own kits as you go.
    • Step 3: Make a list of items that need to be replaced.
    • Step 4: Schedule a day within one week to purchase all needed items.
    • Step 5: Add purchased items to you kits as a family at your next FHE.
    Remember to check in on your 72 hour kits every 6 months.  April and October Conference is a fun time to do this as the kids can enjoy 'free' granola bars during Conference week-end.

    If you do not have a kit yet you can look at recommended items by clicking '72 hour kit 3 month plan' on the right side of the page.  If you cannot get everything at once, use the 3 month plan to start your family's new kits.  Ready.gov also has a basic list of 72 hour kit items found here: http://www.ready.gov/sites/default/files/documents/files/checklist_1.pdf

    When building your kit, consider what you would want in these and similar scenarios:
    • You need to evacuate cannot return for 3 days
    • You are stranded in the aftermath of an earthquake - no communications/power
    • You have been snowed in for a week w/ intermittent power outages


    Sunday, June 24, 2012

    The Evacuation List

    I will assume that most of us at one point or another thought about the possibility of evacuating our homes this week-end due to the Dump Fire on our mountain.  The question is: How prepared were you and what can you do to better prepare?
    A quote from the Deseret News on-line article titled "Nearly 9,000 residents evacuate neighborhoods near Saratoga Springs fire" helps make a point:

    Christian Judd awoke to officials knocking on his door and telling him to evacuate.
    "My immediate reaction was: 'So what do I do?' I don't even know. I've never been in this experience before," Judd said. "I just didn't imagine this would happen to us here.

    Don't we all feel that way?  When do we ever expect a disaster to happen to us?  If we did expect it, I am sure we would put more effort into preparations.

    The question is valid: "What do I do?"  Another quote from the same Deseret News article:

    "It's just crazy. I'm just trying to get pictures and stuff you can't replace," said April, one of the residents who was forced to evacuated her house."

    In the event of an evacuation "What do I take?"

    Here comes the assignment for the week so pay attention. 

    I challenge each family to make a priority list of things they would take in an emergency evaucation.  The list should have three columns with the followng:
    • Item Priority (1, 2, 3, etc.)
    • Item Name
    • Item Location
    Once the list is completed hang it near the primary exit of your home.  If you don't want papers hanging on your wall like me, you can tape it on the inside of a cupboard, coat closet, etc.  Just be sure it is easily accessible.

    A few thoughts on what I will call the Evacuation List. 

    The purpose here is to think about what you need ahead of time so you don't waste time in a real situation.  It is so easy to sit down and write a list now of what is most important.  Brainstorming before the emergency will assure that you will grab the most essential items in the time alloted to evacuate and that you don't forget anything.     

    Your list can have as many items as you like on it.  You may have 5 minutes to evacuate, maybe 15, maybe 30.  But when the emergency comes and you never expected it would happen to you, it doesn't matter, because you are prepared.  You will know exactly what to get and where it is.

    I would recommend 72 hour kits be at the top of the list.  Other things you may want to include (these are in no particular order) are:
    • Important documents (insurance, birth/marriage certificates, etc.)
    • Extra water
    • Extra food
    • Pets and pet needs
    • Irreplaceable keepsakes
    • Journals
    • Laptops or hard drives with important information or family photos
    • Extra clothing
    So go, and make your list.  An ounce of preparation is worth....

    Next week I will discuss how to revamp 72 hour kits to make sure they are sufficient for your family's needs. 

    As always, please report any thoughts or ideas on the blog.


    Wednesday, June 20, 2012

    More on Food Storage

    Short Term Food Storage

    Over the last few months we have focused on short term food storage.  Just to re-cap here is a paragraph about short term food storage from "All is Safely Gathered In":

    "Build a small supply of food that is part of your

    normal, daily diet. One way to do this is to purchase a

    few extra items each week to build a one-week supply

    of food. Then you can gradually increase your supply

    until it is sufficient for three months. These items

    should be rotated regularly to avoid spoilage."

    Also, a list of items to work on from the March 2012 Ensign article: "Everyday Home Storage". 
    Review this list and choose at least one that you can improve on this week:

    • Designate an area in your home where you can keep your food storage.
    • Each time you go grocery shopping, pick up a few nutritious items that will store for several months to add to your storage.
    • Stock up on items when they are on sale, and buy in bulk when practical. Be sure to check expiration labels before you make the purchase.
    • Buy only items you know you’ll use so you can easily rotate through your food storage.
    • Store water in sturdy plastic juice or soft drink bottles that you have emptied and rinsed.
    • Order basic long-term food items such as wheat, flour, and oats from a Church home storage center or other trustworthy organization.
    • Designate a percentage of your monthly budget for food storage.
    • Start putting a percentage of your income or a certain dollar amount in a savings account each month.
    • Help others establish home storage by giving food storage items or money for savings accounts as gifts.

    Long Term Food Storage

    Another paragraph from "All is Safely Gathered In" on Long Term Food Storage:

    "For longer-term needs, and where permitted, gradually

    build a supply of food that will last a long time

    and that you can use to stay alive, such as wheat,

    white rice, and beans.

    These items can last 30 years or more when properly

    packaged and stored in a cool, dry place. A portion of

    these items may be rotated in your three-month supply."

    As you build your long term storage, set a goal to learn how to use and rotate it just as you would your short term storage.  If you don't know how to use wheat and beans, it won't help you when you need it.  So, when you purchase some, learn how to prepare meals with it.

    In addition to storing wheat, rice, beans, and other long term items, I am going to look into long term meal storage such as Daily Bread and Thrive.  These are said to store 25 years and are meals that are easy to reconstitute.  I will report what I learn about these other long term storage programs on the blog.

    Goal

    As always, I encourage you to act upon what you just read.  Choose at least one thing you can do to improve your short and/or long term food storage and do it this week.  It can be as simple as 'find a recipe that uses beans' to 'buy extra salsa for short term storage'.    Please report what you did by commenting on the blog or sending me an e-mail. 


    Friday, June 1, 2012

    Lindon Cannery Openings

    Below is an e-mail from the Lindon Cannery:

    There have been several cancellations for Salsa on June 5-8th. The online signups are closed, so if you are still interested in doing salsa, please call the Cannery @ 801-785-0998 to check for available shifts.
    We will be selling surplus family canning when you come to your shift. (You have to have worked on Jams, Syrup or Salsa to be able to purchase these surplus products. The only days you can purchase are on the days we are doing the Salsa: June 5, 6, 7 and 8.) The following products will be sold without limit, until they are gone:
    Raspberry Jam - $24.00/case of 12 pint jars
    Peach Jam - $21.00/case of 12 pint jars
    Pancake Syrup - $21.00/case of 6 – ½ gal jugs (may be purchased individually @ $3.50/jug).
    Ground Beef - $76.80/case of 24
    Beef Stew - $44.40/case of 24
    Pork & Beans - $20.40/case of 24
    You must arrive early enough to purchase before the shift begins. Otherwise, you will have to come back at the end of your shift in order to purchase.

    Saturday, April 21, 2012

    Done with Food Storage

    I'm not done with my food storage yet, just about done talking about it on the blog.  So this is the last post about short term food storage and the first about long term.

    I hope you have a plan that is in action for stocking up short term food storage (things you eat on a regular basis).  Whether it is the 5/5 plan, the raid the caselot plan (Macey's has a good one this week, don't miss it!) or you own customized plan, please have a plan and work on it!  

    As far as long term storage, there are a few options to explore.  You can store wheat, beans, flour, etc. in large quantities for each family member.  You can store dehydrated and powdered items.  You can store MRE's.  You can store pre-made entrees that store long term such as the products made by Wise Foods. 

    You goal for this week is to decide which long term solution works for you.  Remember whatever you choose, you must know how to prepare it in a time of need.  The purpose of long term storage is to have plenty of food should a long term disaster strike.  Whether it is a large scale disaster affecting entire cities (such as an earthquake), or a small one, affecting just your family (such as unemployment or hospitalization). 

    Just because I may not post about short term storage, don't forget to keep working on it.  Having a pantry or storage room full of foods you eat regularly should be your first defense in any kind of a disaster.  Long term storage will keep you covered after you exhaust the short term. 

    Good luck, Go Team!

    PS Please share thoughts, solutions, and any good info you may find by commenting on the blog.  Thanks.

    Tuesday, April 17, 2012

    Were you Ready?

    The Utah Shake out was this morning at 10:15.  Chances are 100% that you survived with no complications.  However, whether you participated or not, let's consider what would have happened if this earthquake was real and not hypothetical.  Starting this morning...
    • You would be without power for weeks
    • You would have no water for weeks to months
    • Cell lines would be jammed
    • Travel would be extremely difficult
    • Natural gas would be unavailable
    Just pretend the earthquake happened this morning.  Now that you are without basic utilities, cell phones, and unable to travel, how will you survive the next few days and weeks?  Do you have a solution for each of the following questions?
    • It is cold, how will you stay warm?
    • Do you have enough food for the next few weeks/months on hand?
    • Do you have a means to cook food?
    • Do you have drinking water?
    • Do you have water for hygiene?
    • Do you have basic hygienic necessities on hand?
    • If you have an infant, do you have food and supplies for him/her?
    • How will you communicate with family/friends?
    • Do you have a First-Aid kit and the knowledge to treat injuries with it?
    • Does each family member have a 72-hour kit to assist with the above needs?
    • Do your children have emergency kits at school?
    • Do you have an emergency kit and equipment in your vehicle?  At your office?
    Please consider these questions.  Choose just one question that you are unprepared for and make a plan of how to become prepared.  Please share your idea/experience on the blog.  Then choose another and so on until you can sufficiently answer each question with ease.

    For more information on the hypothetical situation of a Wasatch Fault quake, please see the video on this page: http://www.shakeout.org/utah/whyparticipate/

    Monday, April 9, 2012

    Utah Shake Out!

    On April 17th at 10:00 am Utah is holding a state wide earthquake drill.  There are over 830,000 Utahns already registered to participate.  Go to this link http://www.shakeout.org/utah/ to register for yourself and/or your family.

    While there browse through the website.  It is full of great information on how to prepare for a major earthquake and even includes a video that shares a realistic scenario of what will happen when the wasatch fault slips.  See the video here: http://www.shakeout.org/utah/whyparticipate/

    Spread the word!

    Wednesday, March 28, 2012

    Free Conference Treats!

    It's conference time again.  Guess what that means?  Yes, yes, a fantastic, spiritual, uplifting week-end, but also....time to inventory your 72-hour kits! 

    Get out every family member's kits and make sure everything is up to date and nothing has expired or will expire in the next 6 months. 

    And there is the good part.  If it will expire in the next 6 months, you get free conference treats!  Check dates on juice boxes, trail mix, granola bars, etc.  Enjoy them for conference if they are about to expire and remember to re-stock your kits within a week or as soon as you can.

    Enjoy Conference!

    (For an idea of what should go in a 72-hour kit, click the link on the right side of the blog '72-Hour kit - 3 month plan')

    Tuesday, March 20, 2012

    What is the 5/5 Plan?

    As outlined in the book : "Food Storage for the Clueless" (pg. 38) the 5/5 Plan is an easy way to make a small but steady contribution to your food and home storage.  Here is the formula:

    $5/week + 5 minutes/week = a start on food storage!

    I just got back from Walmart on double coupon Tuesday!  I can tell you there are a lot of items you can purchase in 5 minutes for $5 on double coupon Tuesday.  Here are some things I got today:

    Snuggle fabric softener sheets = $0.87
    Bounty paper towel single roll = $0.50
    Old El Paso Taco Seasoning mix = $0.28
    Starkist Tuna canned = $0.38
    Swanson canned chicked breast = $1.38

    Those are just a few examples.

    The best thing about couponing for these deals is that I get 5 coupons in the paper per product.  I can easily stock up on 5 of one item for $1 each.  That makes the 5/5 rule easy!

    Come to my coupon class tonight and learn how to use all kinds of coupons (not all coupons come in the paper) to stock up on food and home storage!  I will teach it personally so there is no pressure to buy a newspaper subscription from anyone.  There will be games, treats, and a lot of fun.  Hope to see you tonight!

    Even if you can't come tonight and/or do not want to coupon, I challenge you to start the 5/5 plan this week!  If you don't already have a list of what do store, visit my past post 'Start with Food Storage' and get going.  Once you are organized and ready, it is easy to start with $5 and 5 minutes a week!

    Wednesday, March 7, 2012

    Stock Food Storage by Coupon Clipping!

    *See bottom of this post for a coupon class date and time!*

    A fantastic way to gradually stock up your food storage is by coupon clipping. 

    You can get coupons from the newspaper, by printing them from your own computer, finding 'peelies' on items in the store, getting catalinas (coupons that print at the register), and by using downloadable coupons that you can add to your store card (like your Smith's Fresh Values card). 

    Combine these coupons with sales and promotions (like by 10, get $5 off) and you can enjoy fantastic things! 

    In the past I have 'purchased' the following items for free:

    Toothpaste
    Pasta
    Men's Razors
    Deodorant
    Shampoo
    Soaps/Body Washes

    I have purchased the following for about $0.50:

    Chips
    General Mills Cereal
    Kelloggs Cereal
    Chip Dips
    Chex Mix
    Ragu Sauce
    Swanson Chicken Broth
    Campbells Soups
    Toothbrushes
    Feminine Products
    Spaghettios
    Pillsbury Grands
    Go-gurts
    Canned Vegetables
    Canned Beans

    The list can go on! 

    By now you should have your list of what you want to store and even a way to inventory it.  Maybe you even have empty shelves labeled that you need to stock, well, now is the time.

    I will teach a free coupon clipping class at my house on Tuesday, March 20th at 6:30. 

    I am not associated with the newspaper or anyone who would officially teach this kind of class.  I just have a few years couponing experience and am willing to teach you what I know. 

    If you are able to attend, please reply to the blog, give me a call, or send an e-mail.

    Thanks!

    Monday, February 13, 2012

    Dinner in a Bag

    Here are some dinner recipes that are great for food storage.  If you really want to get into it, you can actually package everything on the ingredient list into a box or bag and label it. 

    When it comes time to make dinner, just head to the food storage and grab a bag!  Everything you need is right there.  This is a great way to 'see' how many meals you actually have in food storage.

    If you have a vacuum sealer, you can even measure and store spices long term.  Canned meat will come in handy when packaging meals this way. 


    Here are some recipes, but don't stop here, create your own as well.


    Hawaiian Haystacks

    Cooked Rice, Sauce (recipe below), grated cheese, and any veggies you have canned or fresh
     
    Sauce:  1 ½ cups water

                    1 ½ t chicken bouillon

                    2 cans cream of chicken soup

                    2 cups diced chicken breast

                    1/8 t each of onion salt and garlic salt.

    Mix all ingredients together and warm in a saucepan on the stove ( or microwave)

    Salad topping ideas:  Peas, corn, chopped tomatoes, diced celery, sliced olives, diced sweet peppers, chow mein noodles, pineapple tidbits, cashew nuts, coconut, raisins, sliced green onion, slivered almonds

    Spaghetti

    1 Bag Noodles                           1 pint Meat

    1 can spaghetti sauce

    Cook noodles according to directions. Warm sauce in large saucepan. Add meat and noodles.

    Taco Soup

    1 can corn                                 1 can kidney beans

    1 can black beans                      1 can diced tomatoes

    1 sm. Can tomato sauce              1 pint meat

    Taco Seasoning

    Place all ingredients in large saucepan. Cook until beans are tender.


    Chili

    2 cans chili beans                      1 can diced tomatoes

    1 can kidney beans                     1 can black beans

    1 pint meat                               Chili Powder

    Place all ingredients in large saucepan. Cook until beans are tender.

    Shepherds’ Pie

    1/2 cup chopped onion                                   1 pound ground beef

    2-3 cups diced carrots, beans and corn         1 can tomato soup

    1 t Worcestershire sauce                                      ¼ t dried thyme

    ¼ t pepper                                                   Mashed potatoes
     
    Cook meat and onion till meat is brown.  Stir in veggies and ¼ cup water.  Cook, covered, 5-10 minutes till veggies are tender.  Stir in soup, Worcestershire sauce, thyme, and pepper.  Transfer to a 9x13 dish.  Top with mashed potatoes and grated cheese.  Microwave for 3-5 minutes or until heated through, or bake in 375 oven for 30 minutes or till heated through.


    Beef Macaroni

    1 pound ground beef                  2 cans (14-1/2 oz each) stewed tomatoes

    1/4 cup dried minced onion        1 teaspoon salt

    1 teaspoon chili powder             1/4 to 1/2 teaspoon pepper

    1/4 teaspoon sugar                    1 cup uncooked elbow macaroni

    In a large skillet, cook beef over medium heat until no longer pink; drain. Add tomatoes and seasonings; bring to a boil. Reduce heat and simmer for 5 minutes. Stir in macaroni; cover and simmer for 15 minutes. Uncover; simmer until macaroni is tender and sauce is thickened. Yield: 4 servings.


    Beef Soup

    1 pint meat                               Diced potatoes

    Diced carrots                           Dried onions

    2 (16 oz) cans tomato soup

    Rehydrate potatoes and carrots in 2 parts water for 20 minutes. Drain. Pour all ingredients into large sauce pan. Heat through


    Cheesey Mac

    1 pint meat                               1 can tomato soup

    1 can cheddar cheese soup         2 c pasta

    Mix together all ingredients. Pour into casserole dish. Bake at 350 degrees until heated through.

    Chicken Stuffing Casserole

    1 pint chicken                                     1 box stuffing mix

    1 can cream chicken soup                     ½ c. Parmesan Cheese

    1 T. butter, melted

    Mix together soup and chicken. Spoon into casserole dish. Sprinkle stuffing on top. Then sprinkle cheese. Top with butter and bake at 350 degrees til browned.


    Ritz Chicken

    1 pint chicken                                     Ritz Crackers

    2 can cream chicken                            1 T. butter, melted

    2 T. poppy seeds                                2. cups rice.

    Mix chicken with soup. Spoon in casserole dish. Crumble crackers. Mix together poppy seeds, melted butter, and crushed crackers and arrange on top. Bake at 350 degrees until browned. (About 30 min. ) Cook rice.


    Country Chicken Soup

    1 pint chicken                                     1 c. diced carrots

    1 c. diced potatoes                              2 oz dry onion soup mix

    2 T. sugar                                             4  c. water

    1 (28 oz) can crushed tomatoes        ½ c. small pasta

    1 T. Italian Seasoning                         1 T. oil
     
    In a large stock pot, heat oil over medium heat; sir in carrots, potatoes, onion soup mix, sugar, water, tomatoes, Italian seasoning, hot pepper sauce, and pepper. Stir frequently. Bring to a boil , add pasta and reduce heat. Simmer gently for 30 to 40 minutes or until vegetables are tender. Add chicken. Heat through


    Chicken Salsa

    1 pint chicken                                     1 jar black bean salsa

    Rice

    Cook rice. Add jar of salsa and chicken to rice.


    Chicken Alfredo

    Pasta Noodles                                     1 jar Alfredo Sauce

    1 pint chicken


    Cook pasta according to directions. Heat sauce in medium saucepan. Add cooked noodles and chicken. Heat through.

    Thursday, February 2, 2012

    Make your Food Storage Awesome with Canned Meat!

    I went to an activity at my sister-in-law's house (thanks Bryn!) where I watched a demonstration on canning meat at home.  I was surprised at how simple it was! 

    Basically cook your hamburger, put it in a can, and process it in a pressure cooker (must use electric or gas stove)!  Easy peasy.  For chicken, you don't even have to cook it ahead of time.  Just cut it into strips and stuff it in a can.  The meat will cook while it processes.

    The only trick is to make sure you are exact on processing times so you meat seals safely.  But seriously, how great would it be to have Taco meat (yes, you can add flavoring before canning) in your Food Storage?

    Here are the notes my sister-in-law sent me on canning meat (Let me know if anyone is interested and we could possibly arrange a class out here!):

    1. Clean jars (wash jars, boil lids and rings. Use tongs to handle the lids to avoid contamination)
    2. Prepare meat (chicken can be sliced and used raw, strips of meat can also be raw, but ground meat needs to be cooked prior to canning)
    3. Put 1/2 t. of salt in each jar, fill with meat leaving about 1/2 inch of space from the top. Add water to jars only containing ground meat. Place lids on top and screw on ring.
    4. Fill Pressure Canner (it has to be a pressure canner) with 3 quarts of water, place jars inside (if stacking jars, place 2nd row staggered (not directly on top of the 1st row), and place & lock lid on
    5. Turn on heat and wait for a steady stream of steam to be released from steamer (should take about 15 min)
    6. Let vent for 10 minutes
    7. Place the valve on canner
    8. Let pressure get to 14 lbs (takes about 7 min)
    9. Set timer for 75 minutes; making sure pressure stays at 14 lbs the entire time. You will do this by adjusting the heat. If the pressure drops below 13 lbs, you will need to start the timer over

    Stay tuned next week for some great food storage recipes that use canned meat!

    Wednesday, January 25, 2012

    Start with Food Storage

    For the first few months of the year we will be focusing on food storage.  It seems the biggest to tackle and it will be nice to get it in order quickly.

    The Pyles plan for one year's worth of food storage is to have 6 months of rotating (I like to call it pantry) storage and 6 months of long term storage. You may mix and match rotating and long term to suit the needs of your family.

    For your pantry storage the first step is to calculate what you need.  I made a list of 17 meals that our family eats regularly.  More would probably be good.  I thought of as many meals that I could that where all or most of the ingredients are non-perishable (remember you can use canned chicken and hamburger in a lot of meals!  I will have details about canning meat coming soon). I typed down all the ingredients for each meal.  Then I multiplied the list to see approximately what we needed for 6 months.  I noticed some items came out to be a little more than we needed since they are only partially used in one meal.  Adjust the list to fit what you will eat in 6 months.

    The next step is labeling your storage space.  I am going to make labels that say something like this: "Black Beans - 24"  and tape them right onto my shelf.  This, obviously, is where the black beans will go.  With the number needed for 6 month's of storage written right on the shelf where I store them, it will be very easy to do a quick inventory each time I grab some black beans and replace them.

    Once I have my shelves labeled, I will make a huge shopping list.  Now remember, this project will take me one year.  That means I will build this gradually as I can.  If there is a case lot I will quickly 'inventory' my shelves and see what is needed to add to the storage.  I will grab a few extra and little by little build up the amount of each item in storage to match the label.

    Don't forget to label each item with an expiration date when you put it in your storage if it doesn't already have one.  Put new items in back and old ones up front for use.
    The last step is rotation.  As you begin to build the food storage, make a note each time you take something out.  These items can be replaced as part of your normal shopping trip. Since you won't be using them in bulk you don't need to replace in bulk.

    Last thing.  If possible set aside a food storage budget.  Try to use a predetermined amount each month to build your food storage.  Buy a few extra items at the store or hit the case lots with this money.  Then, as stated above, rotate your food as you use it by replacing a few items at a time as part of your regular shopping trip.

    So...go!  Make that list.  See you next week to learn about canning meats. :)

    PS You can find a pre-made excel spreadsheet to use for this activity here: http://foodstoragemadeeasy.net/babysteps/step-3-three-months-of-normal-food/
    Click on "List of Foods"
    You can also use this spreadsheet for inventory purposes if you like.

    Wednesday, January 11, 2012

    2012 The Year of.....

    2012 is the official year of....Preparedness.  Not on a national level, state level, or even community level,  but at the Family level.  2012 is the Year of Preparedness for the Pyles family and we invite everyone to make 2012 a year of preparedness for their families as well.

    The Preparedness Fair in September opened our eyes to all the unpreparedness in our home. There is a lot to do.  Kevin and I have already explored areas we need to improve in and have began to set goals.  We hope to complete all these goals by the end of this year. 

    One year is a fair amount of time and so I invite all of you to follow along with my blog this year and I will take you step by step through the Pyles Year of Preparedness.  We will exlpore food storage, home storage, emergency kits, basic safety, and communication.  Use what we are doing for inspiration for your own families.  Get ideas from us and modify them to work for your family and circumstances. 

    The hope of the Pyles Family is to go to bed on December 31st 2012 and rest well, knowing that all is safely gathered in.  For "if ye are prepared ye shall not fear." D&C 38:30

    Stay posted, there is more to come...